How to Make A Skunk2 Pro Series+ Camber Kit (Pictures)
 07-20-2009, 06:46 PM
#1
Registered Member
Thread Starter
Join Date: May 2008
Location: Hampton, VA
Posts: 1,210
Likes: 0
Received 0 Likes
on
0 Posts


This thread may seem dumb to some, but it is meant for informational purposes and because I couldn't find anyone who has done this and I didn't know if it was possible, so I'm sure somebody else may wonder too. As I was doing this it turned into more of a tutorial on how to press in polyurethane bushings. Which may also be helpful to some.
This thread was started due to this one:Megan Racing 96-00 civic camber kit?. In the end, instead of buying the Megan Racing camber kit I decided to try to fit new Skunk2 v2 replacement ball joints and some Energy Suspension polyurethane upper control arm bushings I already had, in my completely worn out Ebay camber kit. What it will essentially be is a Skunk2 Pro Series Plus front camber kit for a lot cheaper than you can buy one new, even on the bay.
Well my ball joints got here today and I couldn't wait to try and see if they fit. I pull control arms out, and after a little more than 1 year, my ebay camber kit is shot:
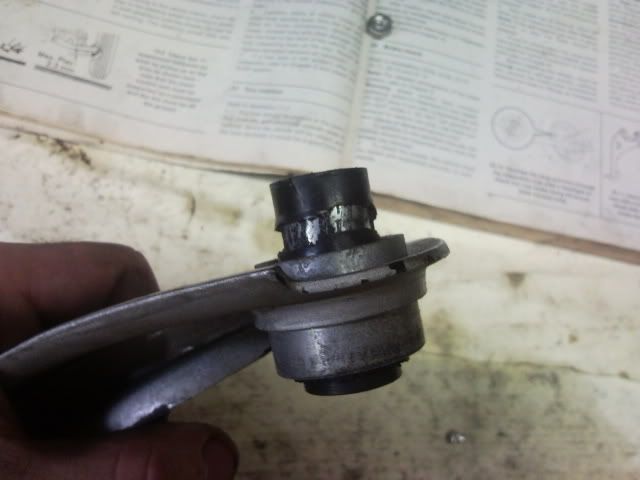

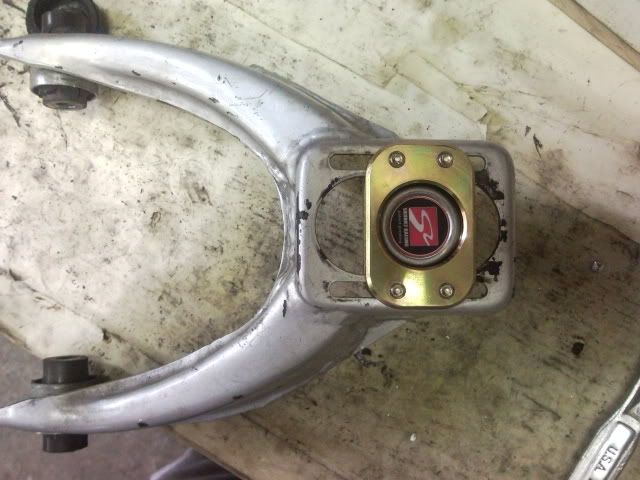
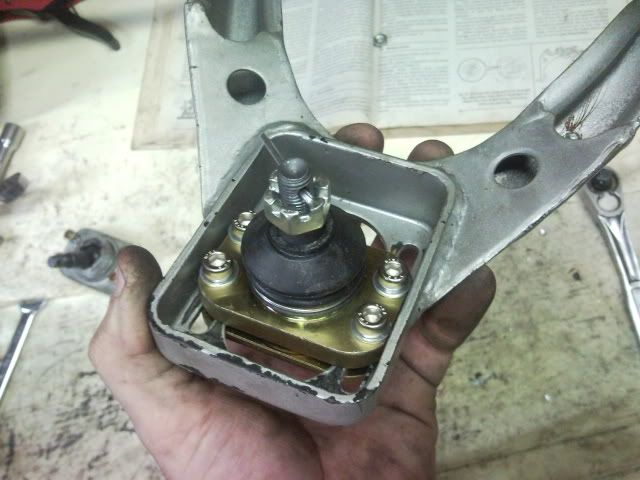
I went ahead and took the old ball joint out and the new one bolted right in. After all, all these cheap kits are just copies of the good stuff. I made a mark on the control arm at the edge of the old ball joint to line up the new one so the camber would stay the same:

The new one was obviously of a much higher quality than the blown one:
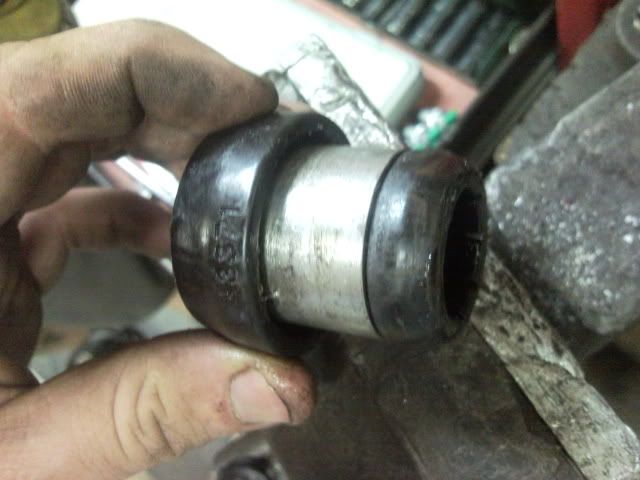
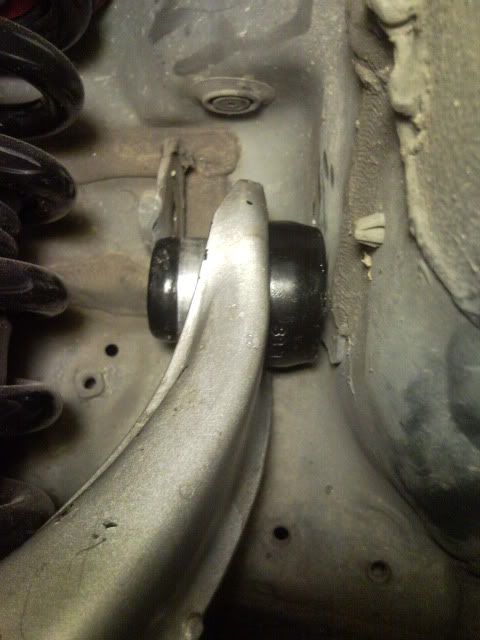
I knew if they fit, that was obviously going to be the easy part, the polyurethane bushings were going to be the real bitch of this project. The first bushing was shot as you can see and I just opened my vice a little and beat it out with a hammer:

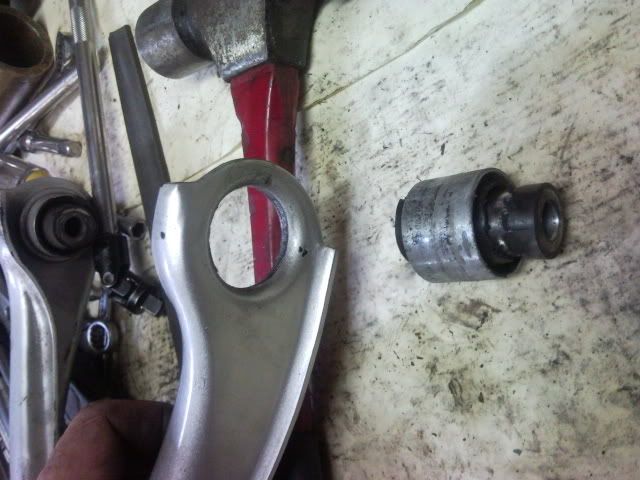
I pulled it apart by hand it was so worn out:
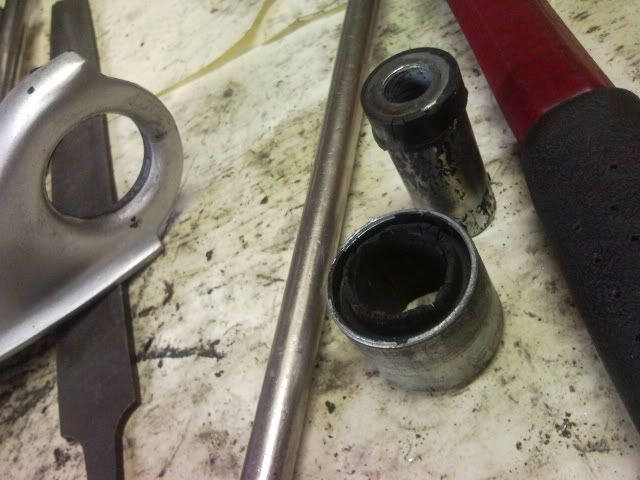
All the others were still somewhat in tact and I pressed them out like this: (Black socket same size as sleeve, the bushing, and a lugnut that was the same size as the center. Pushing the lugnut into the sleeve and socket.)
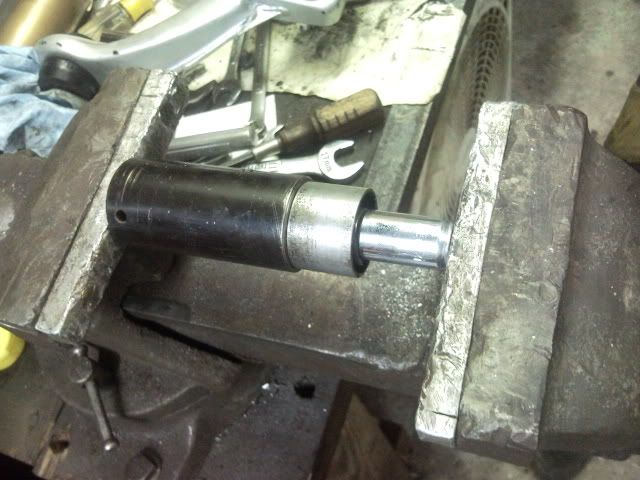
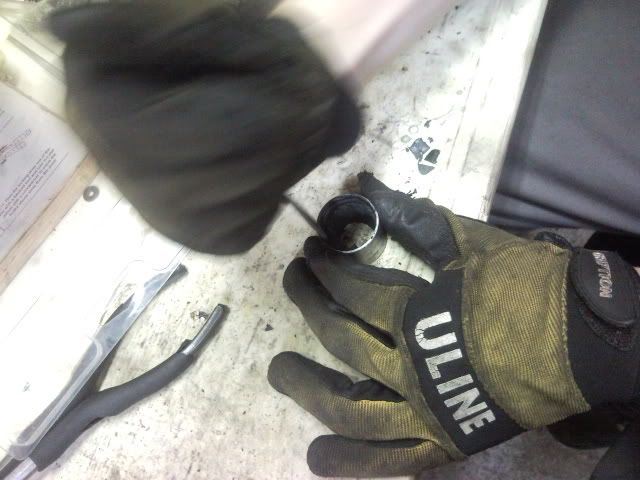
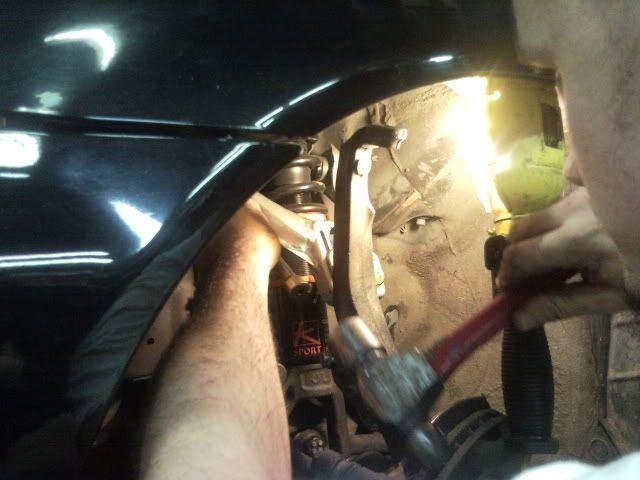
After cleaning the rubber from the inside of the sleeve with a knife, I lubed up the Energy Suspension bushings and put it in vice and pressed it in until it hit the other side. Then used a socket of proper diameter to push it all the way through. Also a pic of my friend Josh about to stab himself in the hand getting the rubber out. That's how you don't do it.

After that, I for some reason didn't take pictures of me putting the bushing and sleeve back into the control arm. I basically just put it against the vice, and hammer it in making sure it went in straight. I realize it is not the best way to do it, but it worked better than trying to press it in with the vice, so I went with it.
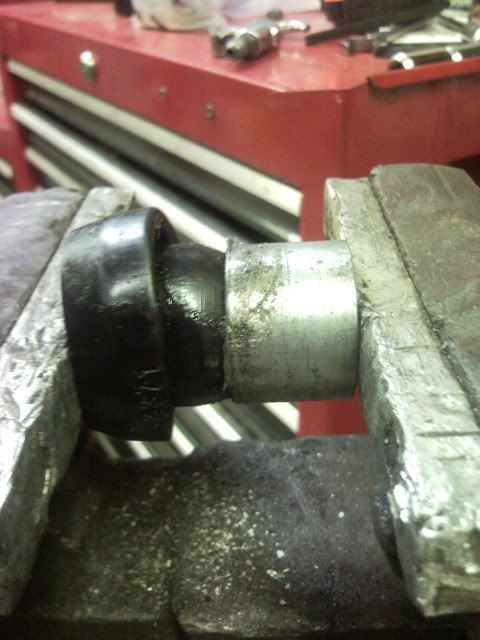
Then I lubed the brass pin and pressed it into the bushing:
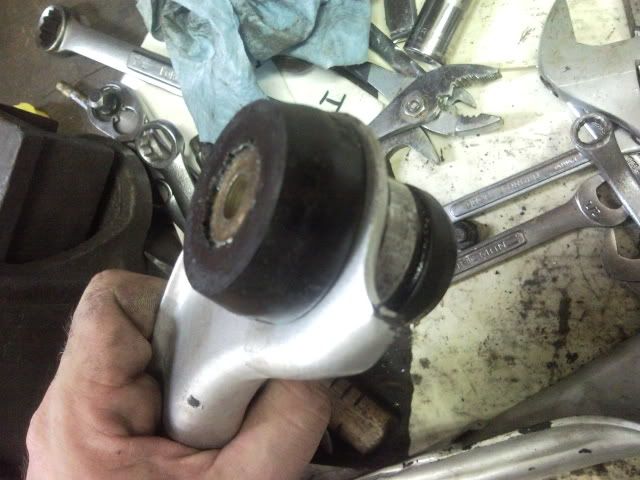
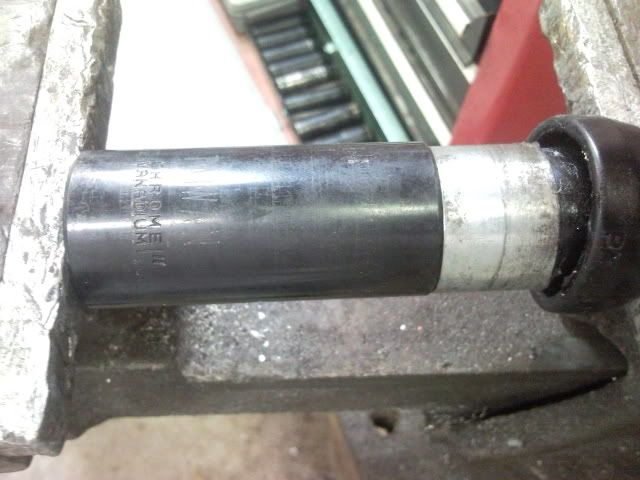
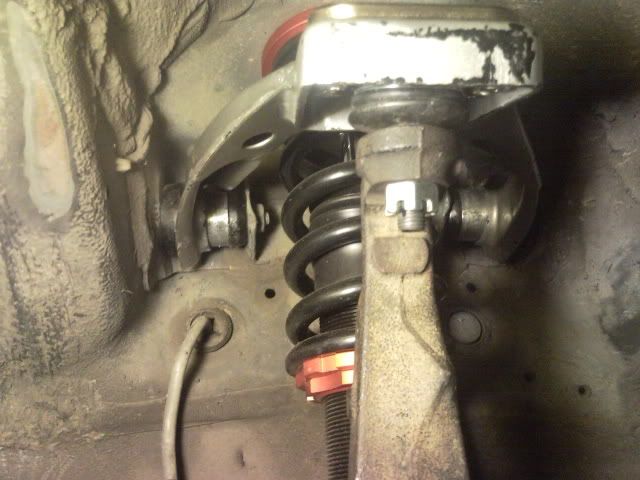
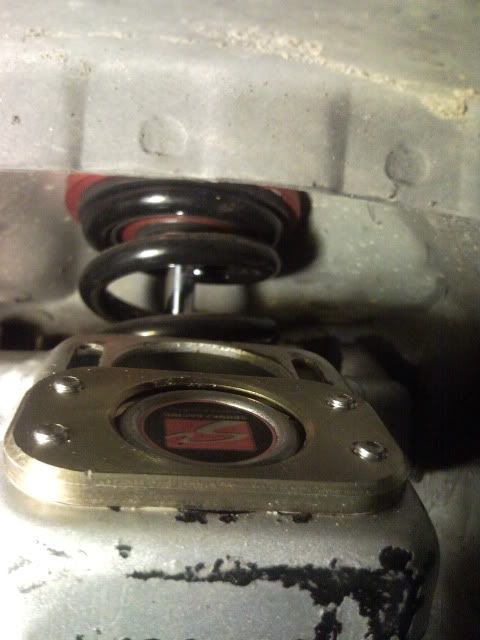
After that, I repeated for the other side obviously, then installed. It was tight fit as usual with new poly bushings:
A little persuasion:
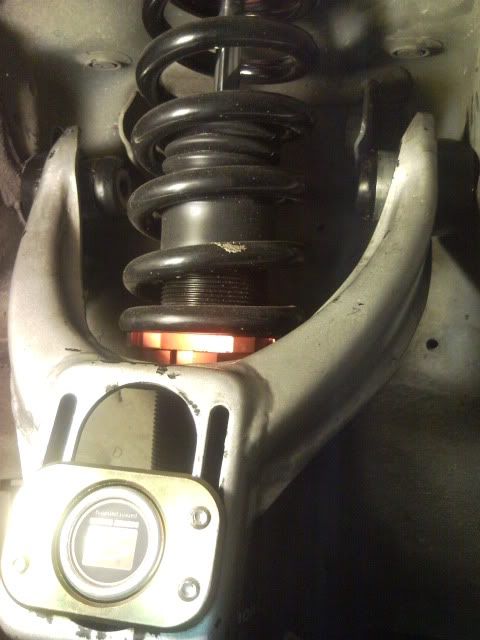
And it's in, now the other side:
Hope that was informative to somebody. Again, no need to flame this for whatever reason, it is for informational purpose for those who may not know how.
Price List: (for a 00' Civic SI)
-Skunk2 v2 Replacement Ball Joints: www.lightningmotorsports.com - $34.05
-Energy Suspension Control Arm Bushings: (comes with upper and lowers) www.energysuspensionparts.com - $51.28
-Ebay Camber Kit: it was something like $100 I think for front and rears
-New Skunk2 Pro Series Plus pair of control arms: $230-250
This thread was started due to this one:Megan Racing 96-00 civic camber kit?. In the end, instead of buying the Megan Racing camber kit I decided to try to fit new Skunk2 v2 replacement ball joints and some Energy Suspension polyurethane upper control arm bushings I already had, in my completely worn out Ebay camber kit. What it will essentially be is a Skunk2 Pro Series Plus front camber kit for a lot cheaper than you can buy one new, even on the bay.
Well my ball joints got here today and I couldn't wait to try and see if they fit. I pull control arms out, and after a little more than 1 year, my ebay camber kit is shot:
I went ahead and took the old ball joint out and the new one bolted right in. After all, all these cheap kits are just copies of the good stuff. I made a mark on the control arm at the edge of the old ball joint to line up the new one so the camber would stay the same:
The new one was obviously of a much higher quality than the blown one:
I knew if they fit, that was obviously going to be the easy part, the polyurethane bushings were going to be the real bitch of this project. The first bushing was shot as you can see and I just opened my vice a little and beat it out with a hammer:
I pulled it apart by hand it was so worn out:
All the others were still somewhat in tact and I pressed them out like this: (Black socket same size as sleeve, the bushing, and a lugnut that was the same size as the center. Pushing the lugnut into the sleeve and socket.)
After cleaning the rubber from the inside of the sleeve with a knife, I lubed up the Energy Suspension bushings and put it in vice and pressed it in until it hit the other side. Then used a socket of proper diameter to push it all the way through. Also a pic of my friend Josh about to stab himself in the hand getting the rubber out. That's how you don't do it.
After that, I for some reason didn't take pictures of me putting the bushing and sleeve back into the control arm. I basically just put it against the vice, and hammer it in making sure it went in straight. I realize it is not the best way to do it, but it worked better than trying to press it in with the vice, so I went with it.
Then I lubed the brass pin and pressed it into the bushing:
After that, I repeated for the other side obviously, then installed. It was tight fit as usual with new poly bushings:
A little persuasion:
And it's in, now the other side:
Hope that was informative to somebody. Again, no need to flame this for whatever reason, it is for informational purpose for those who may not know how.
Price List: (for a 00' Civic SI)
-Skunk2 v2 Replacement Ball Joints: www.lightningmotorsports.com - $34.05
-Energy Suspension Control Arm Bushings: (comes with upper and lowers) www.energysuspensionparts.com - $51.28
-Ebay Camber Kit: it was something like $100 I think for front and rears
-New Skunk2 Pro Series Plus pair of control arms: $230-250
Last edited by disheeki546; 07-23-2009 at 12:53 PM.
 07-20-2009, 08:24 PM
#2
Registered Member

Join Date: Mar 2008
Location: hell
Posts: 945
Likes: 0
Received 0 Likes
on
0 Posts
sweet. how much were those balljoints and where did you get them from
07-21-2009, 02:40 AM
#3
Registered Member
Thread Starter
Join Date: May 2008
Location: Hampton, VA
Posts: 1,210
Likes: 0
Received 0 Likes
on
0 Posts
edited
07-21-2009, 05:31 AM
#4
Sorry. Not really.
Join Date: Nov 2005
Location: Fairfax
Posts: 8,283
Likes: 0
Received 0 Likes
on
0 Posts
 I should have done this instead of spending a grip on skunk2 a-arms.
07-21-2009, 10:24 AM
I should have done this instead of spending a grip on skunk2 a-arms.
07-21-2009, 10:24 AM
#5
Registered member
Join Date: Jun 2005
Location: 757
Posts: 1,640
Likes: 0
Received 0 Likes
on
0 Posts

great write up.
07-21-2009, 12:56 PM
#6
Registered Member

Join Date: Jan 2005
Posts: 868
Likes: 0
Received 0 Likes
on
0 Posts

Good job.
07-21-2009, 06:50 PM
#7
Registered Member
Join Date: Mar 2008
Location: hell
Posts: 945
Likes: 0
Received 0 Likes
on
0 Posts
thanks for the info you added
07-21-2009, 06:57 PM
#8
I Love to Hate
Join Date: Mar 2006
Location: Va Beach
Posts: 6,777
Likes: 0
Received 0 Likes
on
0 Posts
nice. glad the previous arguement and persuasion helped ensue a good outcome.
to you
to you
07-22-2009, 06:52 AM
#9
TurboPipingSystems

Join Date: Jul 2003
Location: USDM Land, Va Bch
Posts: 1,483
Likes: 0
Received 0 Likes
on
0 Posts
great work!
07-22-2009, 03:47 PM
#10
やくざに成りたい
Join Date: Nov 2004
Location: virginia beach
Posts: 2,174
Likes: 0
Received 0 Likes
on
0 Posts

nice, so is it cheaper to buy the skunk 2s? or to buy everything and just build this one?

